Statistics Builder
EuroKing Stats Builder is a separate application outside of the EuroKing Maternity Information System. Users can interrogate EuroKing data to analyse questionnaire and TopForm results.
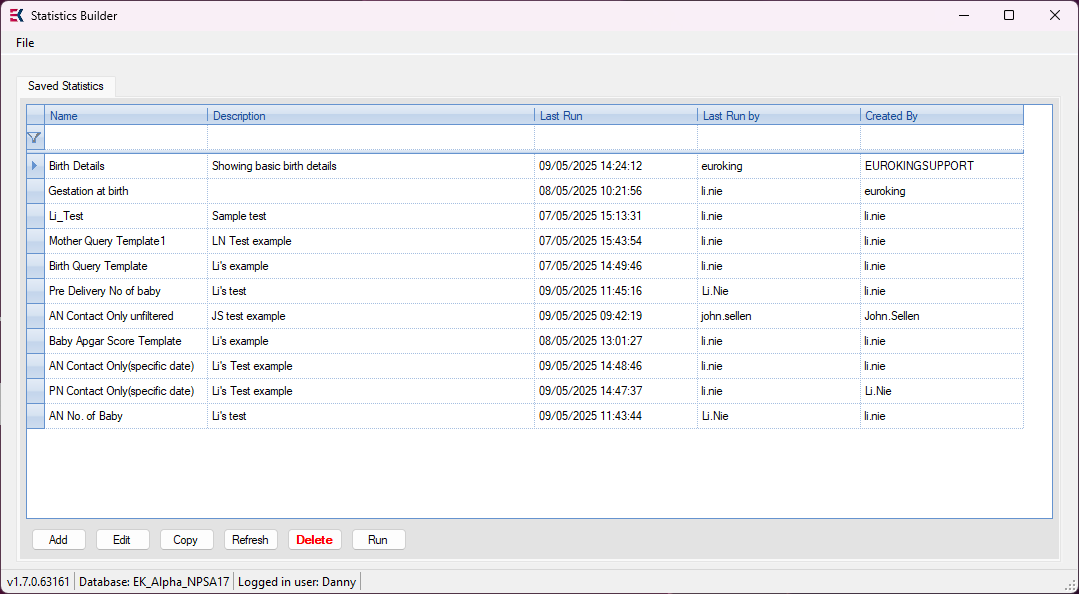
Statistics Builder opens with the Saved Statistics tab by default. All saved queries currently on the system are displayed.
From the Saved Statistics tab:
-
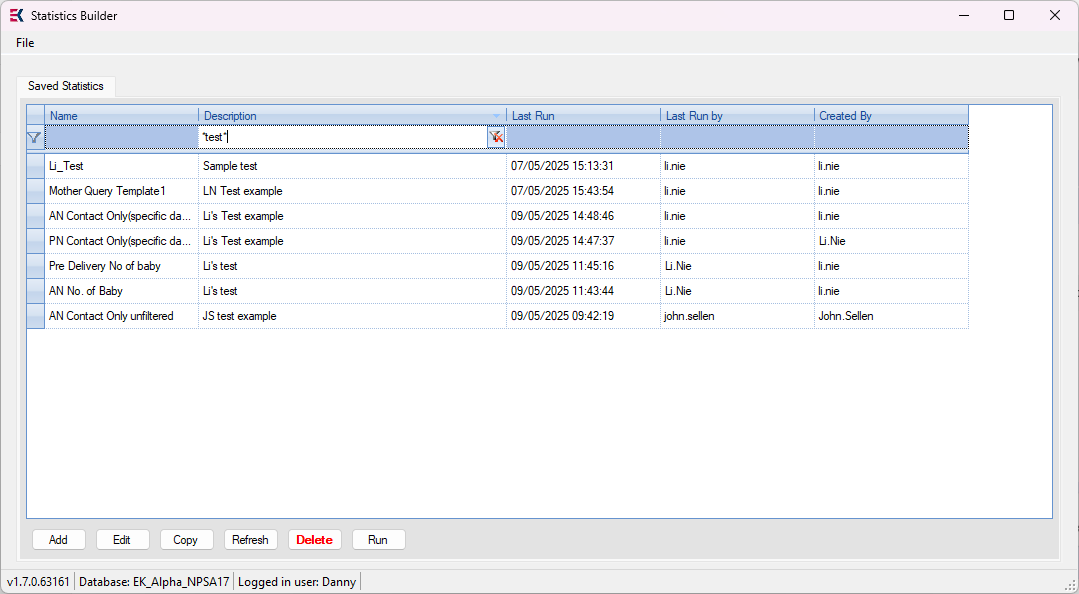
Click a column heading to reorganise queries in ascending/descending order.
-
Click the filter row of a column to filter entries. The filter row is a free text entry field based on exact matches. Wrap the text in asterisks e.g. *keyword* to include partial matches.
-
Click the remove filter button within the filter row to remove applied filters.
From the Saved Statistics tab the following options are available:
| Add | Add a new statistical query. |
| Edit | Edit the currently selected query. Alternatively, double-click the query record. |
| Copy | Copy an existing query, use to create similar queries to existing ones. |
| Refresh | Refresh the query list. |
| Delete | Delete an existing query. |
| Run | Run the selected query. |
To create a new query, from Saved Statistics click Add. To edit an existing query, double-click the query record. The Query Builder tab opens. Enter a query Name and optional Description in the Statistic Details fields.
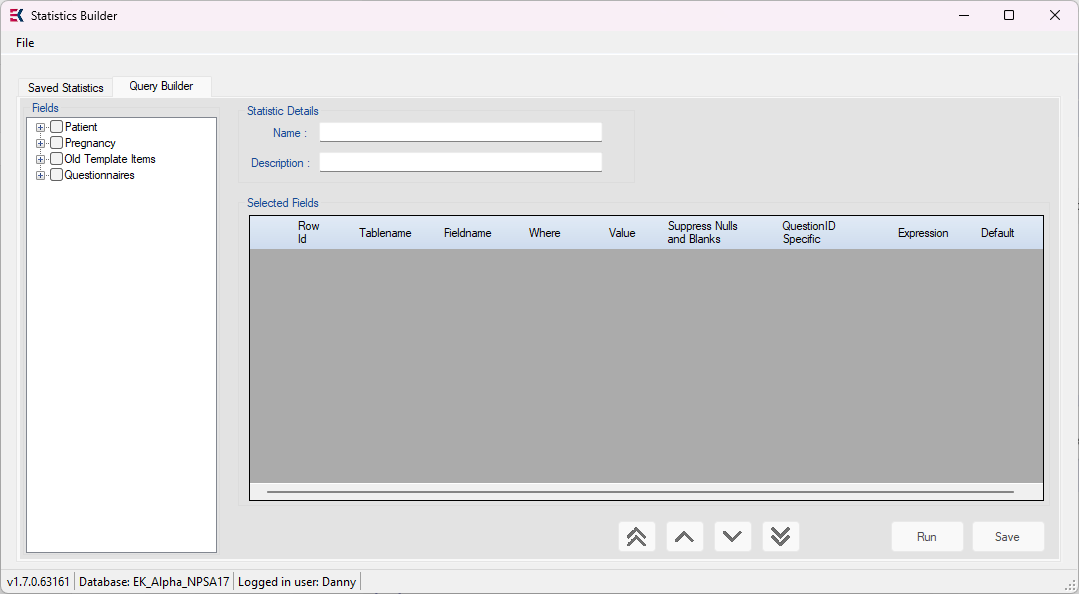
On the left, in the Fields panel, a list of available fields that can be used to construct a query is displayed, organised into different maternity sections.
-
Click + and - to expand and collapse a field section respectively.
-
Click an individual field's tickbox to the left of an item to add it to the Selected Fields panel, including it in the query.
-
Click a folder/subfolder's tickbox to add all fields within a folder to the Selected Fields panel.
-
Use the directional arrows to change the position of a field. Select the field in the list and use single arrows to move the field up or down the list, or double arrows to move straight to the top of the list or straight to the bottom.
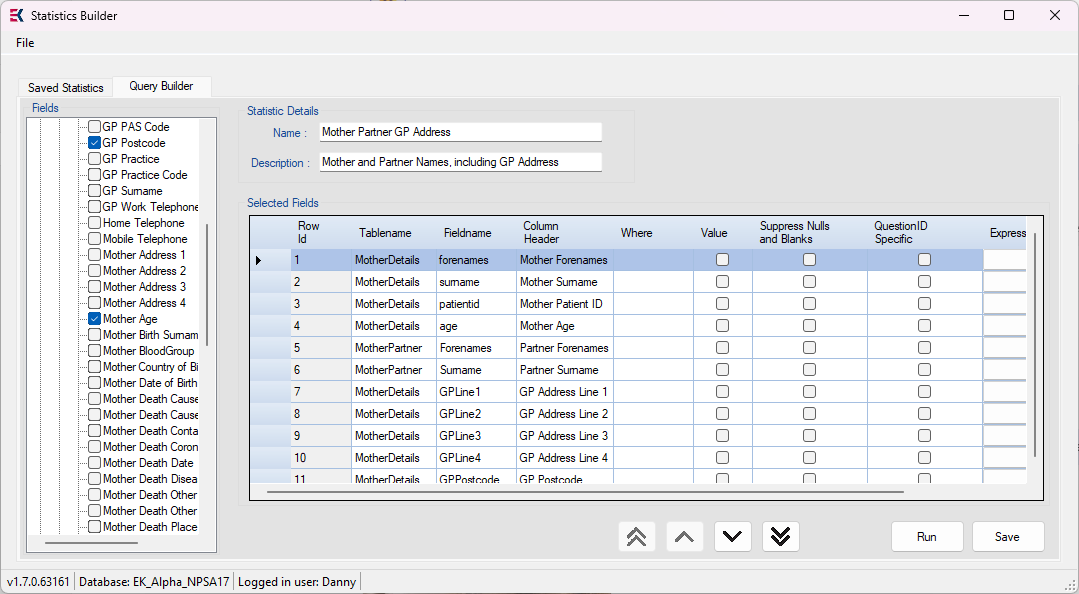
Once all fields are selected, queries can be specified further and data presented in various formats.
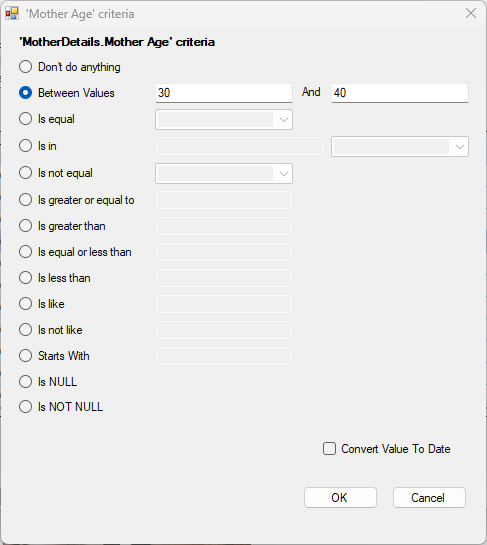
Once fields are added to a query, conditions can be applied to provide more specific analysis of the data. For example, a query that only returns mothers between the ages of 30 and 40 years. To add a condition to a query field:
-
Click the Where Column of the field to add a condition to.
-
Select the radio button to apply a condition. If specific dates are required for a condition, tick Convert Value to Date. The criteria boxes change to date and time pickers.
-
Click OK.
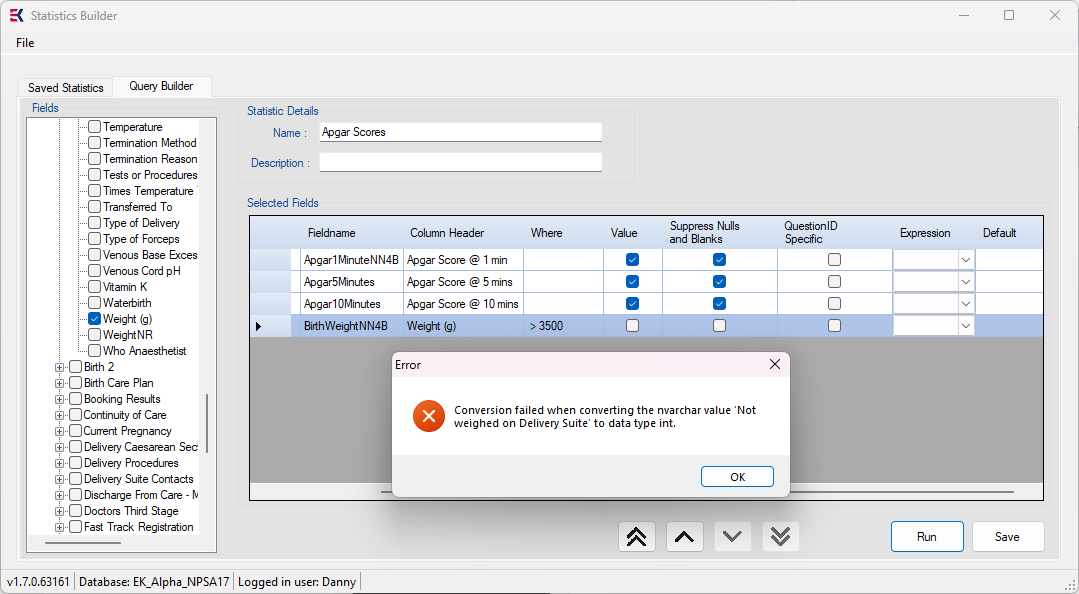
Certain fields can encounter a Conversion Failed error when adding criteria to fields. This occurs when a field's criteria is including/excluding data based on one factor e.g. numerical, and the data features both text and numerical entries.
The example below encounters the error due to the BirthWeightNN4B field having a condition to only include records over 3500g but records may also contain text such as Not weighed on delivery suite.
To rectify the conversion error, from the Conditional Expression column select Is Number. This converts text entries to numerical data. This is a different process to Display results as numerical values.
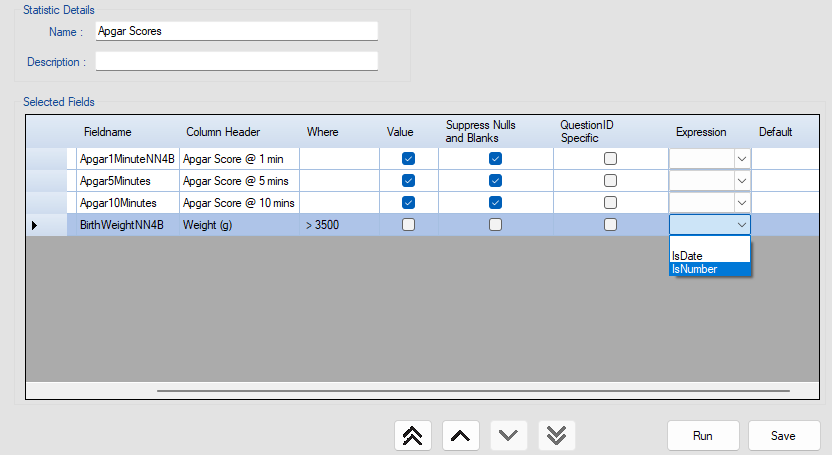
With the correct expression in place the query can now run.
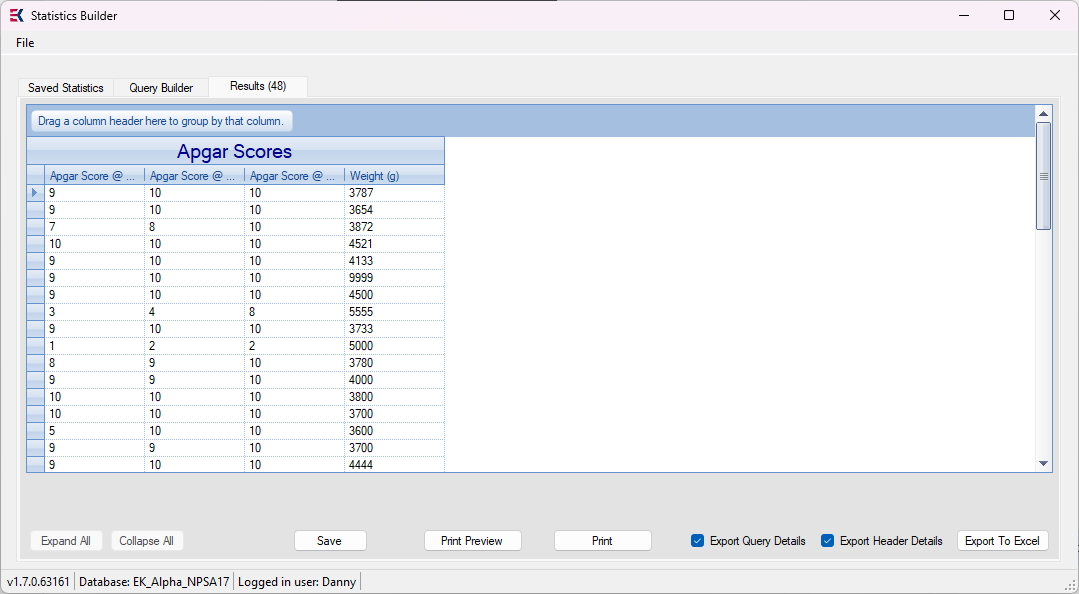
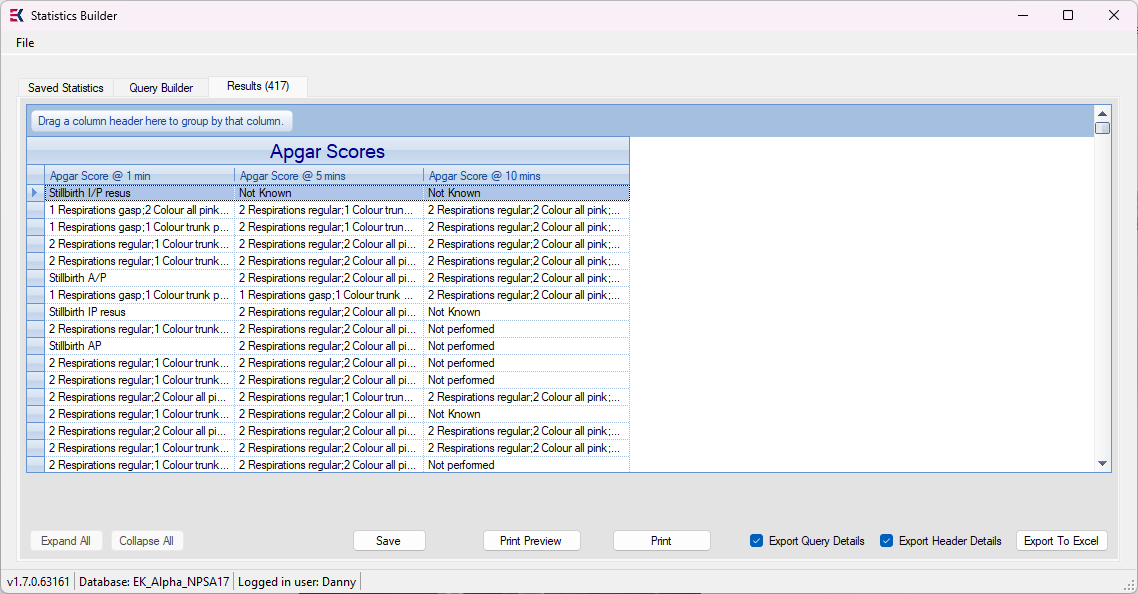
Data in EuroKing can be stored with both a text and numerical value. For example, Apgar Score query results are shown as a combination of text and numbers:
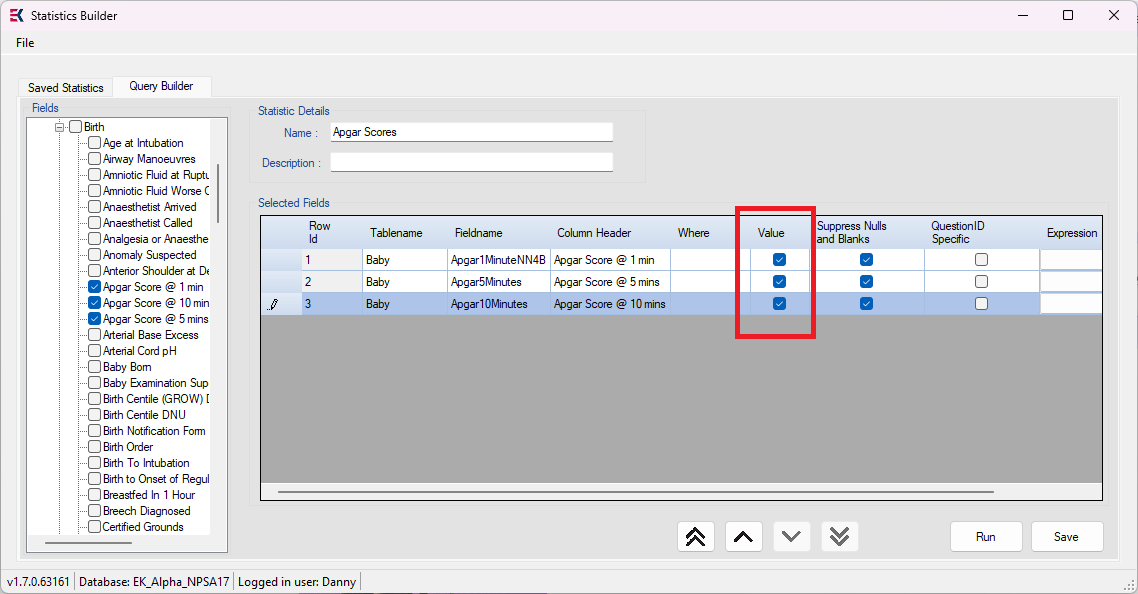
To force the results to display as a numerical value, tick the Value column in the Query Builder.
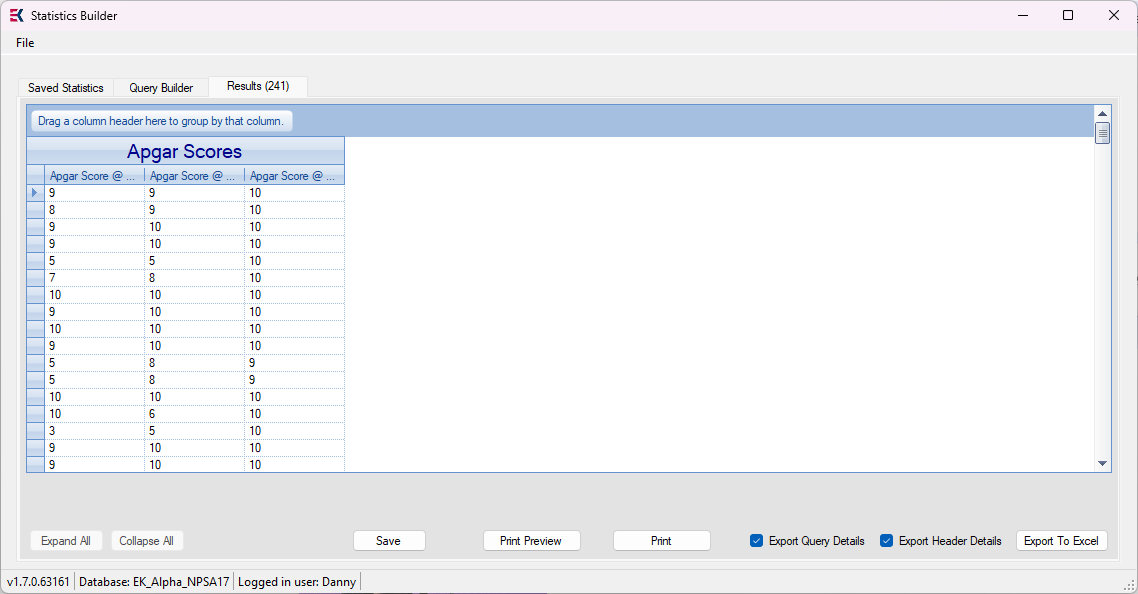
The results now display as numeric values when run:
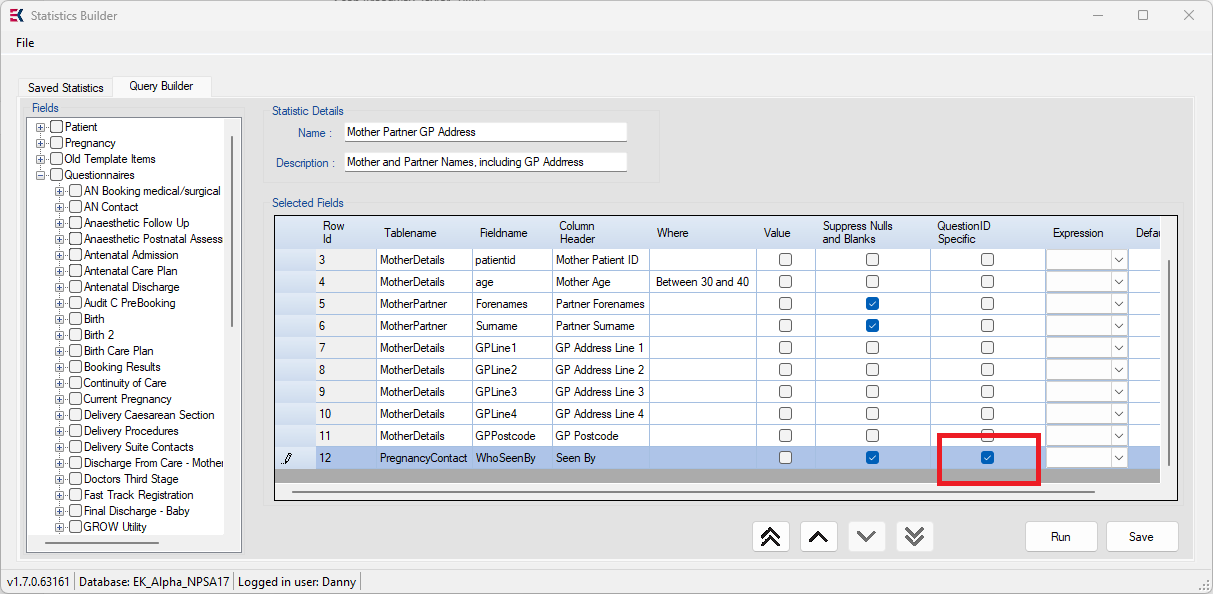
To only display query results that contain a value, tick the Suppress Null and Blanks checkbox in the field row to exclude null and blank values.
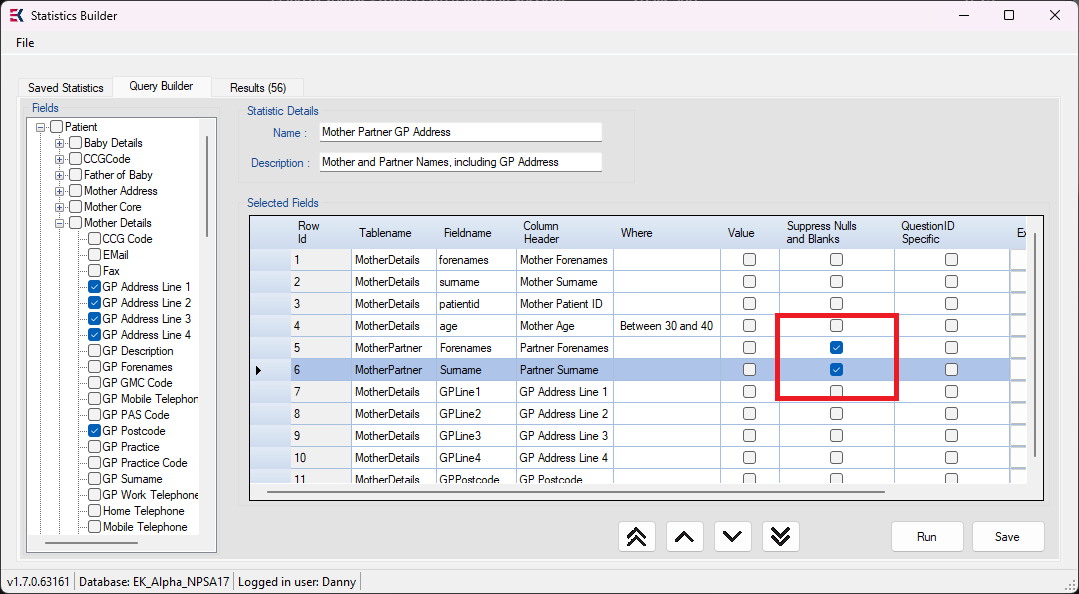
In this example when the query is run, records that do not have a mother's partner forename or surname are not included.
![]()
Certain fields can be found across more than one questionaire in EuroKing, e.g. the Who Seen By field features in both AN Contact and PN Contact questionnaires. As a result, when added to a query, every field answer is returned.
To return only results relating to the questionnaire the field is selected from, tick QuestionID Specific for the field.
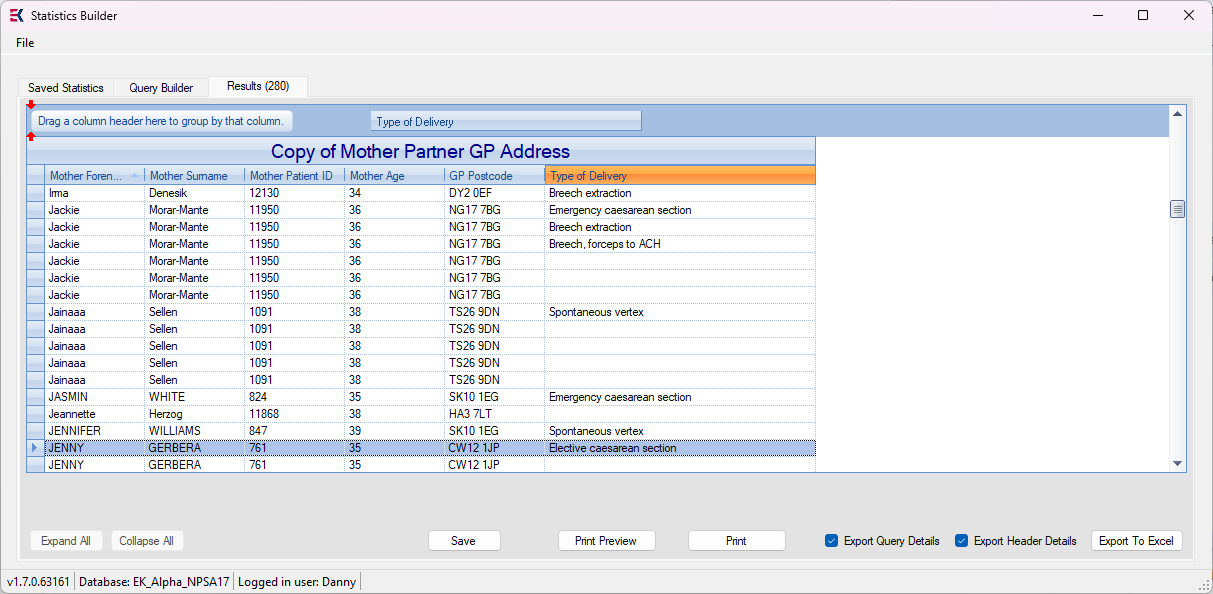
To gather query results, from the Query Builder, click Run. The Results tab is displayed, along with the total amount of records returned in brackets. If encountering a conversion error, see Conversion failed error.

To reformat query results:
-
Resize a column by dragging the column header’s right-hand separator.
-
Change a column's order by clicking and dragging its header.
-
Sort the results by clicking on the column header.
To change a column's title, from the Query Builder, double click the text within Column Header and replace the text.
Click Save.
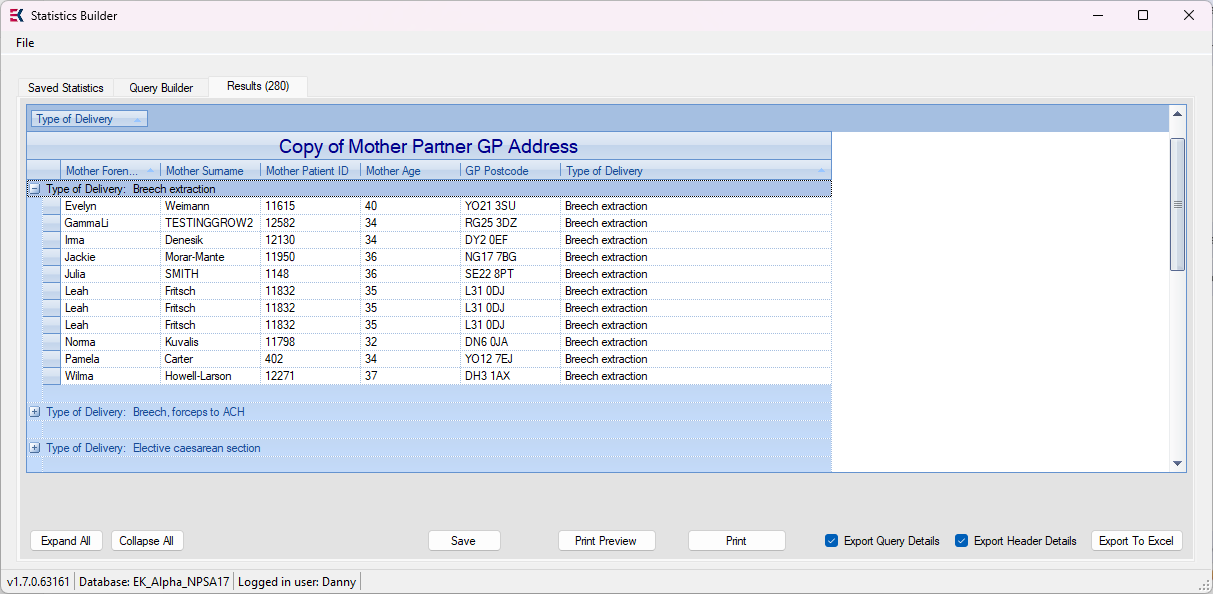
Query results can be grouped further in order to analyse data more effectively. Grouping separates all matching field answers into their own section, for example grouping query results by Type of Delivery, sorts all results into Effective Caesarean Section, Spontanteous Vertex, Emergency Caesarean etc. Data can only be grouped by one field at a time.
To group data, click and drag the column header of the field up into the group banner above the query title.
The data is now separated, use the expand icon to open a group or Expand All and Collapse All to open/close groupings respectively.
To remove the grouping, click and drag the field out of the group banner.
Once a query has run, results can be saved, printed, and exported via the options at the bottom of the Results tab.
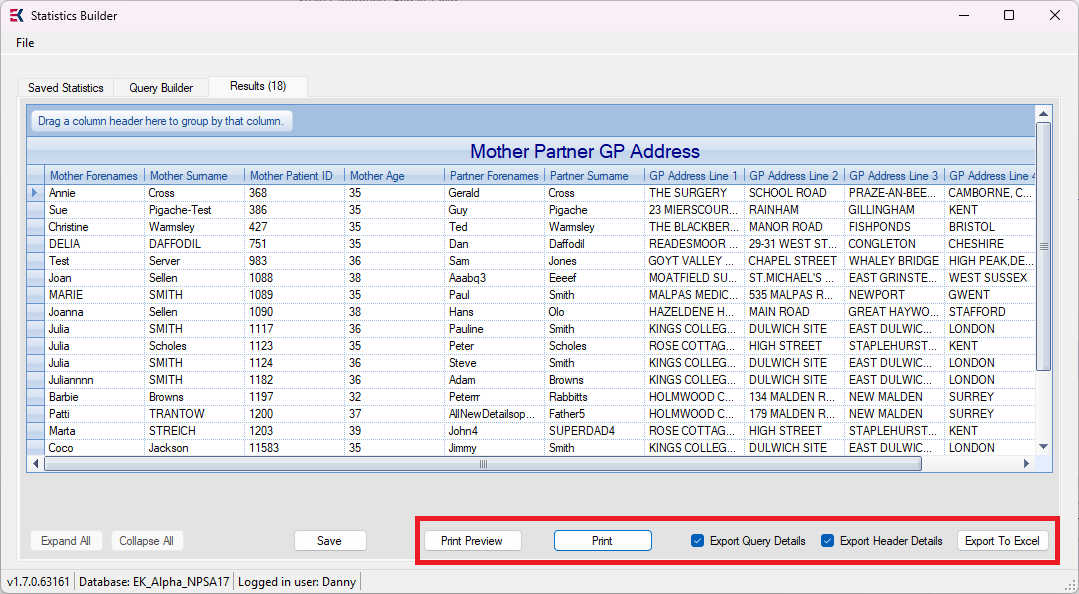
| Print Preview | Generates a print preview of the results. Use the Print icon within the Print Preview to save the results as a PDF file. |
| Print the results. | |
| Export Query Details |
Not used, no changes are made to the output excel file regardless of these tickboxes being checked or unchecked. |
| Export Header Details | |
| Export To Excel | Export the results to excel. To only export selected lines of the results, [Ctrl] click to select records and select No to the Export all lines prompt. |